In the fast-paced world of marketing, the ability to synchronize and track campaign responses across multiple platforms is crucial for optimizing results and improving customer engagement. The new Response Center and updated Campaign Dashboards make this seamless and easy.
The Response Center will play in increasingly important role in our industry-leading direct mail automation platform. Designed with marketers in mind, this update enables users to capture and track campaign responses from virtually any marketing platform through webhooks, all within the Postalytics Campaign Dashboard.
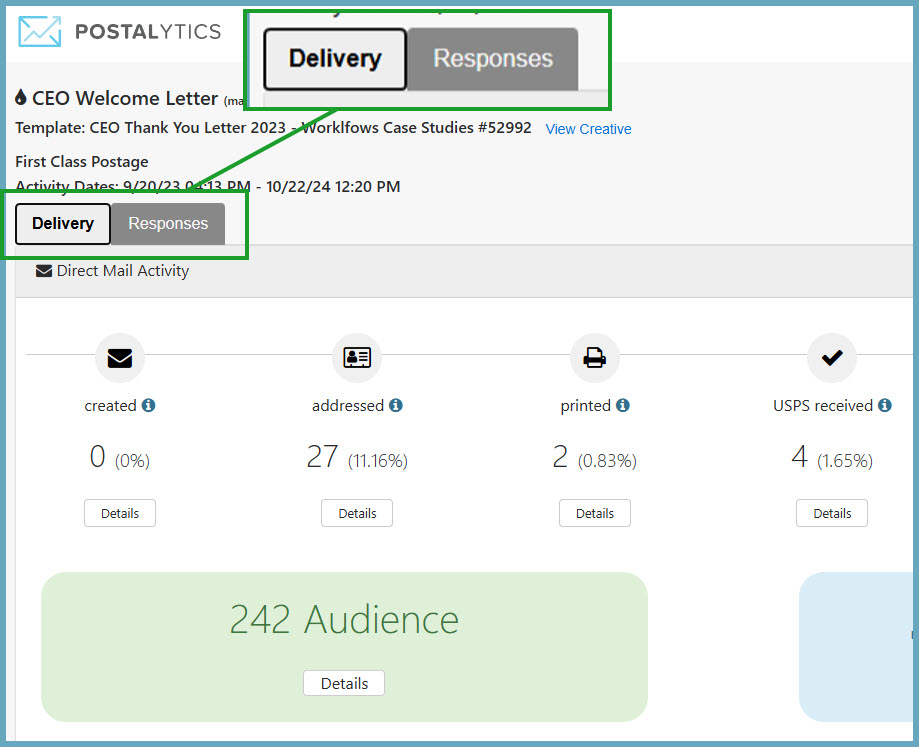
In order to accommodate this powerful new functionality, we’ve also updated and refreshed the Campaign Dashboard. We’ve separated the Delivery stats and metrics and the Response metrics into their own tabs, so that you can quickly and easily digest the most important information about your campaign.
Table of contents
New Campaign Dashboard Organization
With all of the important information that is being tracked in the Campaign Dashboard, we’ve moved the Delivery and Response data into their own “tabs” that are easily accessible at top of the first set of metrics.
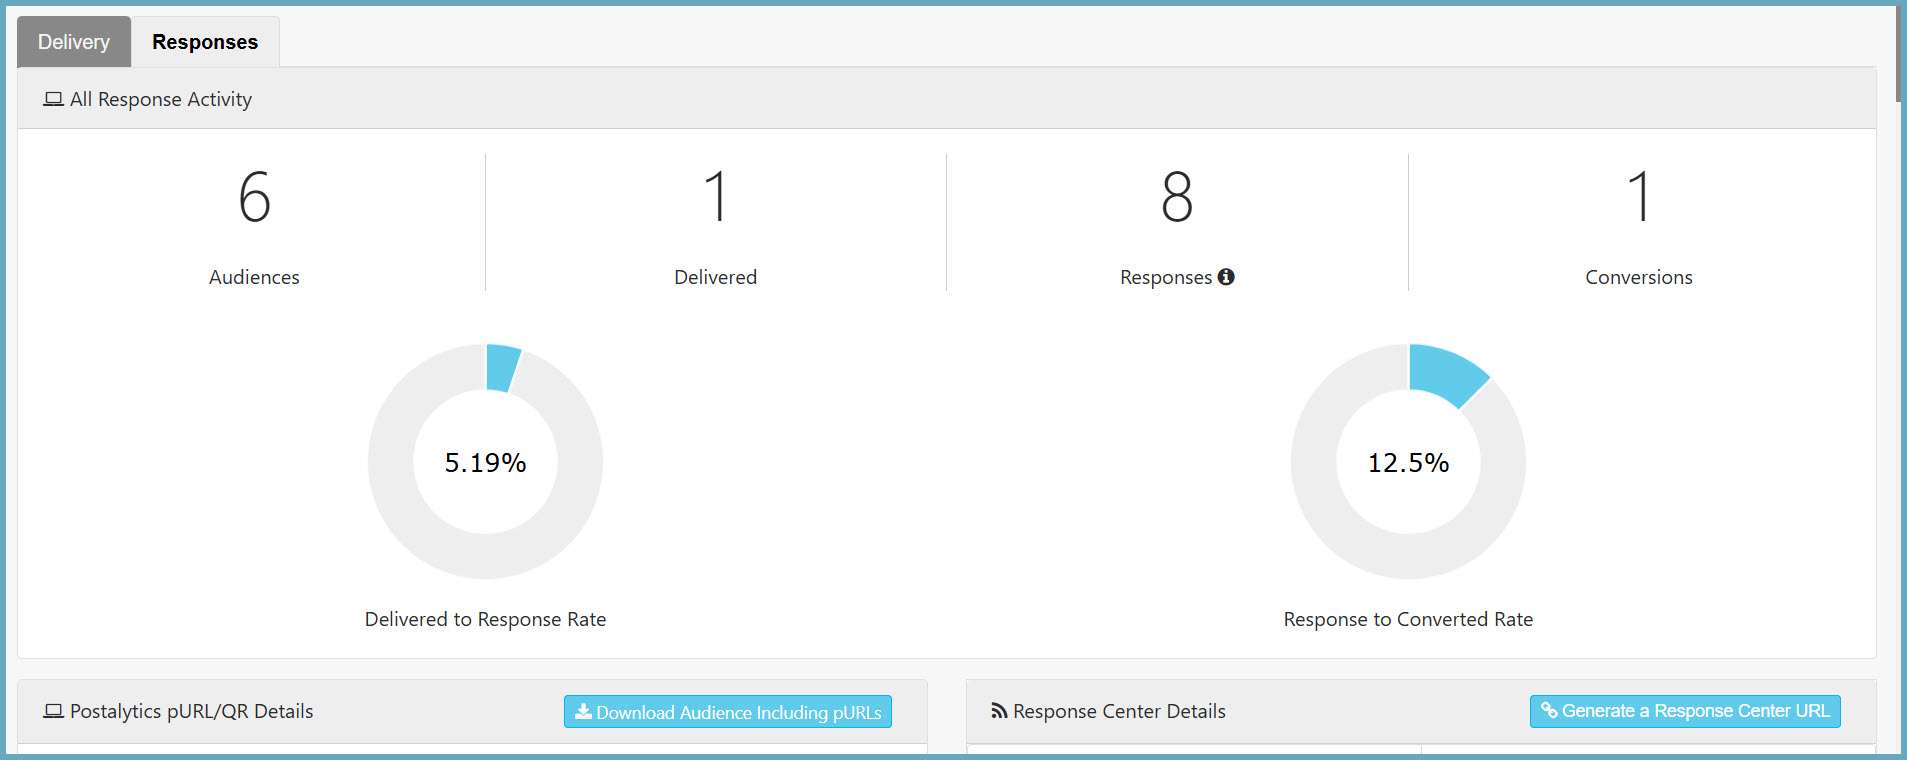
This new layout enables the dashboard to present response data from not only the Postalytics pURL and QR codes, but from additional channels that you’ve integrated via the Response Center.
What Is the Postalytics Response Center?
The Postalytics Response Center is a powerful tool that allows marketers to track responses to their direct mail campaigns in real time by integrating with various marketing platforms. Whether you’re running a postcard campaign or any other type of direct mail initiative, the Response Center captures data through webhooks, which can be triggered by a wide range of events such as sales, signups, calls, text messages or other key conversions.
What makes this feature stand out is that it does not require complex integrations. Instead, it operates via webhook POST requests, which nearly every marketing tool supports. This enables the capturing of response data from your other marketing tools and displaying it directly on your campaign dashboard in Postalytics. By centralizing your campaign tracking efforts, it is much easier to assess the success of your campaigns and the response across different channels.
Check out our Knowledgebase article on the Response Center:
Why Marketers Should Use the Response Center
By pulling together direct mail responses into a single dashboard, marketers get benefits that have only been available to them by juggling spreadsheets and consolidating data months after campaigns have finished. Among the benefits:
- Streamlined campaign tracking in a single dashboard – single source of truth
- Real time insights – no more data collection with spreadsheets long after the campaign has completed
- Better Campaign ROI – by getting a comprehensive view of your campaign performance across different response channels, you can more accurately calculate your ROI and decide where to invest in future campaigns
How To Set Up the Postalytics Response Center
Setting up the Response Center is straightforward, even for marketers who may not have deep technical expertise. Below is a step-by-step guide to help you get started.
Ensure You Have the Necessary Prerequisites
Before you begin, make sure you have:
- A Postalytics account – it can be the Free, Marketer, Pro or Agency account
- A Postalytics Campaign (Smart Send, Triggered Drip or Automated File Campaign)
- Access to another system that captures responses and that supports event-triggered webhooks (such as call tracking systems, text messaging apps, ecommerce platforms, marketing automation tools, etc).
Generate the Response Center URL
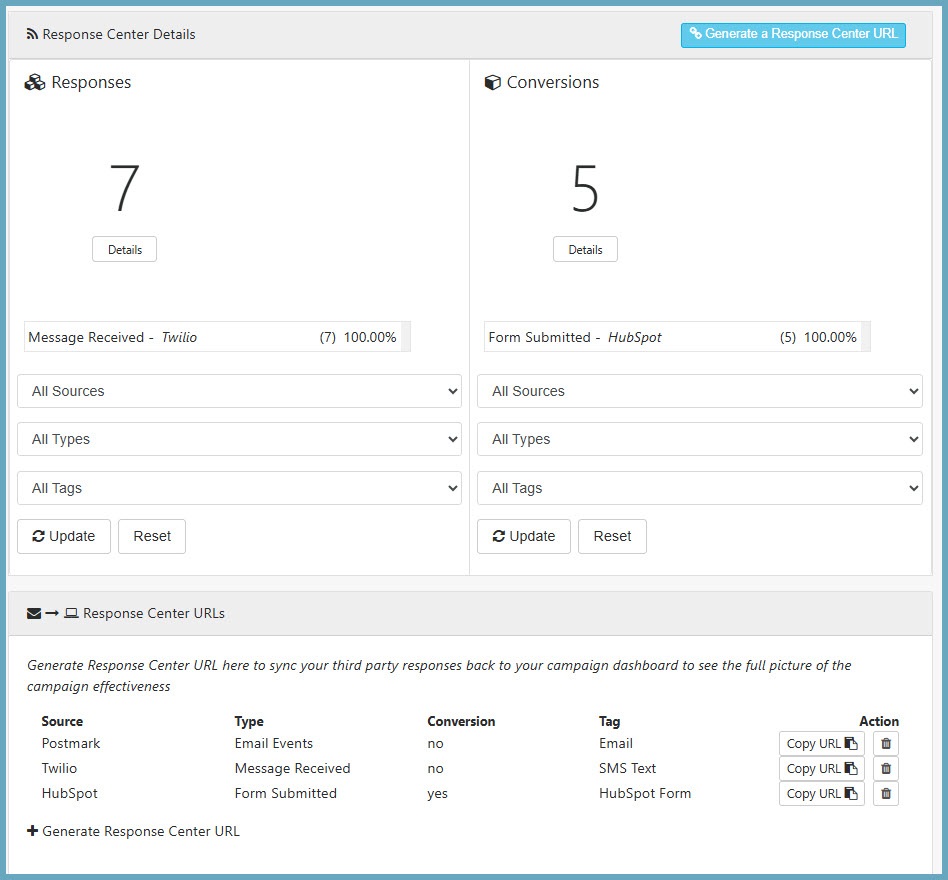
The Response Center URL is the webhook “endpoint” that collects responses from your marketing platform. Each connection you want to make with a campaign and a platform will require a unique URL endpoint. You can easily generate this URL in three different places within the Postalytics platform:
- Response Center Details section in the Campaign Dashboard’s “Responses” tab
- Response Center URL section, also found in the “Responses” tab
- Tracking setup page in the Campaign Wizard during campaign creation
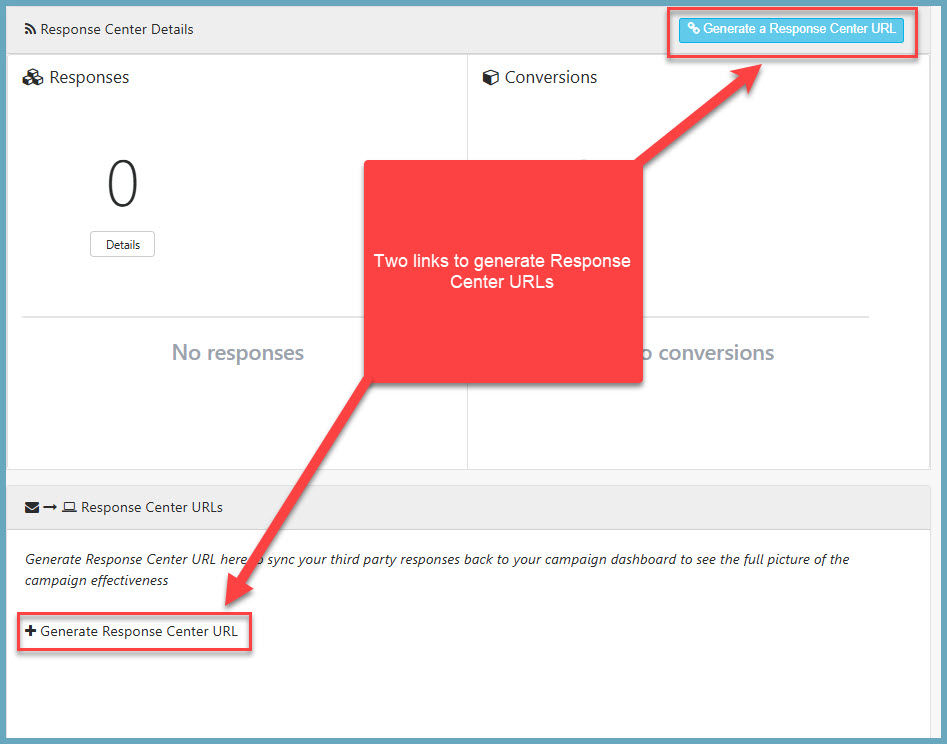
Drop the Response URL Endpoint Into Your Other Platform
Once the URL is generated, copy it to your clipboard. Navigate to the other platform that is capturing response, and drop the URL into the webhook configuration settings. Any modern marketing software has the ability to POST a webhook. Here’s an example of the URL pasted into the Webhook POST function in Zapier, and it is very similar in other platforms:
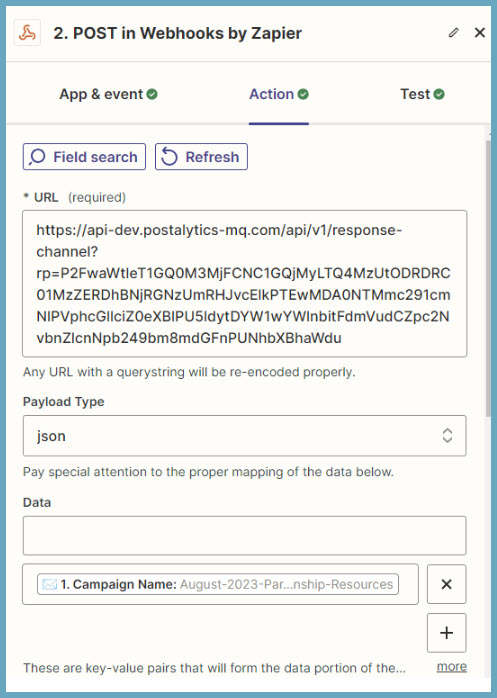
Once you’ve got your Response Center endpoint URL in place, you can test out the integration and activate your response tracking automation!
Check out the detailed Knowledgebase article about the Postalytics Response Center.
What’s Next?
We have a pipeline of several new features that will be released over the coming months, including:
- A new mailing list tool with tons of new data sources
- A new API/Developer portal
- Expanded print network – new locations
- A new workflow automation and campaign scheduling tool
- New campaign types like website retargeting and automated lead mailing
- More direct mail formats
- Full bleed letters
- 8.5×11 “Super-sized” postcards
- Variable data envelopes
- Sales tax calculation
- And much more
Stay tuned for these upcoming announcements and thank you for choosing Postalytics! If you’d like to speak with us about any of these announcements, please reach out to us.
About the Author

Dennis Kelly
Dennis Kelly is CEO and co-founder of Postalytics, the leading direct mail automation platform for marketers to build, deploy and manage direct mail marketing campaigns. Postalytics is Dennis’ 6th startup. He has been involved in starting and growing early-stage technology ventures for over 30 years and has held senior management roles at a diverse set of large technology firms including Computer Associates, Palm Inc. and Achieve Healthcare Information Systems.
